Showing posts with label School Holiday Workshops. Show all posts

Thursday, February 25, 2010

Bordered Boho

Here is the 3/4 elasticised sleeve version of the Boho style top from my previous post.
Fabric from Spotlight - total cost about $15. Pattern is New Look 6730. I cut a size 14.
This style isn't particularly flattering to me - but it's cool and easy.
I'm teaching some Learn to Sew Classes for children in the next holidays. This little top is one of the classes I am offering. Click here for more info.

Sunday, February 21, 2010

February Roundup

In the spirit of my consistent inconsistencies with blogging .... here is an update of stuff going on round here ......

Firstly we have a rather lovely stylish bag made by Nicole - one of my students ....
I have taught her quite well = she has an excellent stash of great fabrics ...... here she has used a Pippijoe print with some lovely grey linen ....
Pattern - Nicole M's SQUARED FLAT BAG - well done to BOTH Nics!
Next up, we have the traditional birthday present (at the present time at least), this one is a cushion for a special young man who is rather keen on one particular NSW rugby league team ...
Images were printed directly onto Prepared Fabric Sheets on my inkjet printer.
I used bleached denim on the back - and I put in an invisible zipper along one of the sides. I use great big cushion inserts from Goldies.
Happy 13th Birthday Corey!
Now, here is a Mod Bag in production ... when sewing multiple lines I like to use this little gadget. You can set the distance of the little ruler, and away you go - it's called a Seam Guide with Ruler - very useful for beginner sewists to gain confidence or for when you know you can't really trust your eyesight accuracy ....


For sewing edges, I like to use #10 Edge Stitch foot for Bernina machines - the little metal plate glides along the fabric edge and you can adjust your needle position to get spot on topstitching.

And here is groovy little Mod - this is a great bag - nice and roomy - great proportions - and lots of design variations available. Fabric from The Fabric Shop in Surry Hills (Sydney).
Inside a did a compartment pocket and a zippered pocket - I also tried adding Pellon to the LINING - it did provide some added structure.
Now, for me. Today I made this New Look pattern.
View B, fabric fromSpotlight - a Summer Voile.

Really easy, I cut a 14. I am going to teach this little Boho top as a Learn to Sew workshop for the next School holidays. I have View A cut out in a border print - so hopefully I'll get that done ready to show you before March!

Sunday, April 19, 2009

Creative Holiday Happenings

There has been plenty of activity at Handmade Sewing Studio these holidays. Here are some of the student's completed items ......

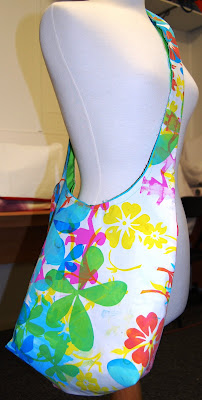
A cool swing bag with some great text printed fabric simply appliqued on the outer flap. This pattern is one that one of my school colleagues designed for our Year 8 students. At school, we tie dye the lining fabric.

This next bag is a bit of a sampler of techniques .... when you don't know how to embellish why not try everything? There is some quilting, some Angelina Fibres, some Chenilling, some gridded patchwork, hand embroidery ......

It's a festival of colour and techniques .... a great achievement for a beginner sewist! The bag design is the same as this one ...


We've also been printing and dyeing and making bags ...


Screen printing is great fun - a bit of messing around - but the results and process is great fun!

It really makes you appreciate how professional fabric designers and printers can do it all so neatly with the correct "repeats" and everything ... but hey! I also enjoy the uniqueness of the HANDMADE look!


After the printing, some of the designs were carefully cut out and appliqued onto a dyed piece for a bag panel ...
The young lady that did this one, then meticulously machine stitched around this rather detailed shape - she did a great job! She used an applique foot and a tiny stitch length - didn't need to drop the feed dogs - due to the brilliance of my Bernina machines (!) - can't help myself!!!

This next cushion features an image printed onto fabric via an inkjet printer ... she then appliqued the design onto some dyed backing fabric.

This is the back of the cushion in the process of attaching some self covered buttons . I think it is very satisfying to not only make an item, but to have coloured the fabric and make design decisions all along the way - you couldn't be more unique and individual - unless of course you actually made the fabric as well - but I can't see 13 year olds enduring that task!


And finally, here is bag made by one of my INTERNATIONAL students .... Anissa is from Belgium and she recently started lessons as a beginner .... she made this bag as a first project from bits and pieces of fabric from the studio ..... same as the previous design ....


The plaited straps are a real feature of this bag! Great work Anissa!

Monday, March 30, 2009

Dyeing and Stitching

Watch out all of you flower children ..... it's the age of Aquarius again!!!! I've been dyeing preparing for some School Holiday Workshops coming up .....

I've been using the Liquid Radiance Colours that I've talked about before ......
Here are the results .... groovy!

What's that Rolling Stones song? ..... ".... like a rainbow..." ?

OK, so here's the cushion - very simple...

And the back ....
Also a simple bag shape - with raw edges cut to be raggy .... this is before the washing machine ..
And this is after a wash and tumble dry ... all fluffy!

Add some cute little yo yos .... Liquid Radiance even dyes the elastic to match!
Voila! Anyone know when the next Woodstock is on???

Tuesday, March 24, 2009

Quillow Talk

I am organising some School Holiday Sewing Workshops for the April school hols. One of the projects is a Quillow ....... This is a Quillow .... It's a quilt that folds into a pillow!

More Prints Charming ..... Just love it - not only visually but tactilly (if that's a word?) - this fabric is soft and lovely - no other way to describe it - a couple of the pieces I used are their hand printed panels that I bought at the Finders Keepers Markets in Sydney - the rocket on the pillow is one such panel ....

So, here is how it folds - this green fabric is the backing ... I quilt tied the layers altogether ...

That funny shape is the running stitch around the "pillow" - so you place the quilt on a flat surface, with the pillow opening "up" - that's where the handles are ... you then fold the quilt longways to the middle and tuck the first bit into the pillow - oh dear, I knew this would be complicated, and I think another photo of that stage may help - but stay with me ...

Fold the remaining length into thirds ... heading down to the pillow ... and tuck it into the pillow.

Here is a close up of the groovy rocket - you can't really see the running stitch, (because I'm so perfectly neat) because it's dark blue on black ...
I followed the instructions from here ..... (I did alter the dimensions and attached the handles) go on, give it a go! When it's unfolded you can slip your footsies into the pillow for some extra cosy warmth.