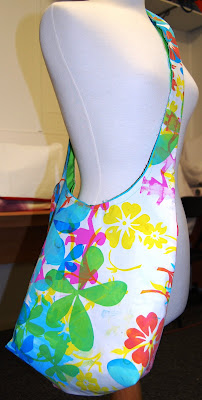
A cool swing bag with some great text printed fabric simply appliqued on the outer flap. This pattern is one that one of my school colleagues designed for our Year 8 students. At school, we tie dye the lining fabric.
 This next bag is a bit of a sampler of techniques .... when you don't know how to embellish why not try everything? There is some quilting, some Angelina Fibres, some Chenilling, some gridded patchwork, hand embroidery ......
 It's a festival of colour and techniques .... a great achievement for a beginner sewist! The bag design is the same as this one ...
We've also been printing and dyeing and making bags ...


Screen printing is great fun - a bit of messing around - but the results and process is great fun!
 It really makes you appreciate how professional fabric designers and printers can do it all so neatly with the correct "repeats" and everything ... but hey! I also enjoy the uniqueness of the HANDMADE look!

After the printing, some of the designs were carefully cut out and appliqued onto a dyed piece for a bag panel ...
The young lady that did this one, then meticulously machine stitched around this rather detailed shape - she did a great job! She used an applique foot and a tiny stitch length - didn't need to drop the feed dogs - due to the brilliance of my Bernina machines (!) - can't help myself!!!
 This next cushion features an image printed onto fabric via an inkjet printer ... she then appliqued the design onto some dyed backing fabric.
 This is the back of the cushion in the process of attaching some self covered buttons . I think it is very satisfying to not only make an item, but to have coloured the fabric and make design decisions all along the way - you couldn't be more unique and individual - unless of course you actually made the fabric as well - but I can't see 13 year olds enduring that task!

 It really makes you appreciate how professional fabric designers and printers can do it all so neatly with the correct "repeats" and everything ... but hey! I also enjoy the uniqueness of the HANDMADE look!
After the printing, some of the designs were carefully cut out and appliqued onto a dyed piece for a bag panel ...
The young lady that did this one, then meticulously machine stitched around this rather detailed shape - she did a great job! She used an applique foot and a tiny stitch length - didn't need to drop the feed dogs - due to the brilliance of my Bernina machines (!) - can't help myself!!!
 This next cushion features an image printed onto fabric via an inkjet printer ... she then appliqued the design onto some dyed backing fabric.
 This is the back of the cushion in the process of attaching some self covered buttons . I think it is very satisfying to not only make an item, but to have coloured the fabric and make design decisions all along the way - you couldn't be more unique and individual - unless of course you actually made the fabric as well - but I can't see 13 year olds enduring that task!
And finally, here is bag made by one of my INTERNATIONAL students .... Anissa is from Belgium and she recently started lessons as a beginner .... she made this bag as a first project from bits and pieces of fabric from the studio ..... same as the previous design ....

 The plaited straps are a real feature of this bag! Great work Anissa!


Will have to show my daughter the patchwork bag - it could be another way of reusing neckties - a current obsession of hers.
ReplyDeleteWhat lovely work! My daughter is currently Yr7 and has done no textiles yet at school - I can't wait until she does! x
ReplyDelete